HowTo: My Terminal & Shell setup - Hyper.js + ZSH + starship ☄️🔥
How to configure terminal and shell to stay productive on daily basis? Which shell to use? What are tips & tricks to speed up command line usage?

[Revised at 2020-07-07]
Probably, the first thing that developers do after getting a new computer is… terminal setup. I wanted to share with you my current development setup - here, terminal setup.
Talk is cheap, let’s show some code.
1. Terminal - Hyper.js
1.1 Download and install Hyper.
Let’s go to Hyper™ page and download a version for your OS.
I downloaded a Mac OS version. When we extract zip file Hyper-3.0.2-mac.zip we get a Hyper.app file. To install it just drag it to Applications folder. Now, by using the Spotlight Search (CMD + SPACE) type hyper and there should be a Hyper application on the list.
The Hyper’s window looks like this in my case:
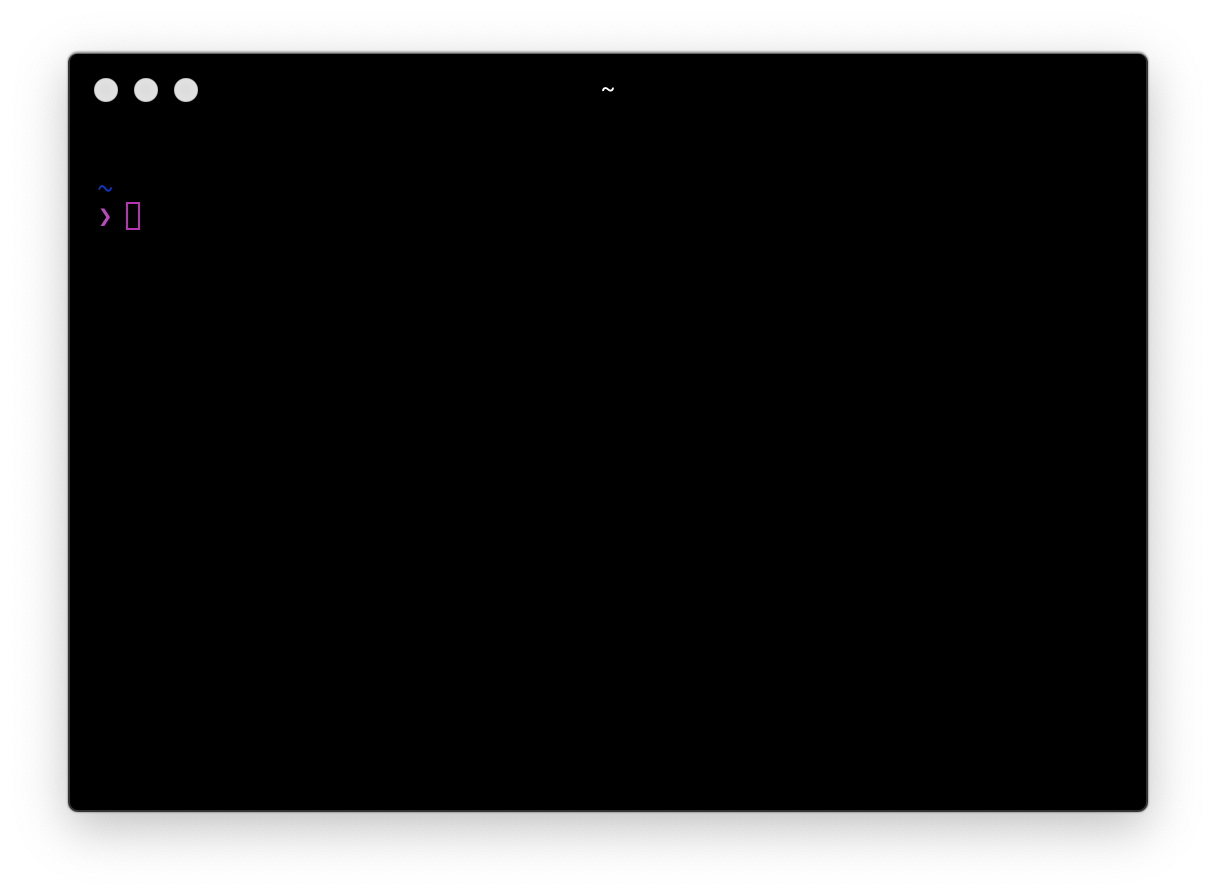
Don’t worry if your prompt looks differently. We are going to take care of it later. You might be using a different shell, different config at the beginning.
1.2 Basic configuration
Now, the magic happens. Hyper’s config is defined as ~/.hyper.js file. File is structured like this:
// Future versions of Hyper may add additional config options,
// which will not automatically be merged into this file.
// See https://hyper.is#cfg for all currently supported options.

module.exports = {
  config: {
    // choose either `'stable'` for receiving highly polished,
    // or `'canary'` for less polished but more frequent updates
    updateChannel: 'stable',

    // default font size in pixels for all tabs
    fontSize: 12,

    // font family with optional fallbacks
    fontFamily: 'Menlo, "DejaVu Sans Mono", Consolas, "Lucida Console", monospace',

    // default font weight: 'normal' or 'bold'
    fontWeight: 'normal',

    // rest of the config
  }
  // rest of the file
}
This is awesome information! We have complete control over our settings.
Let’ start with basic config.
1.2.1 Font
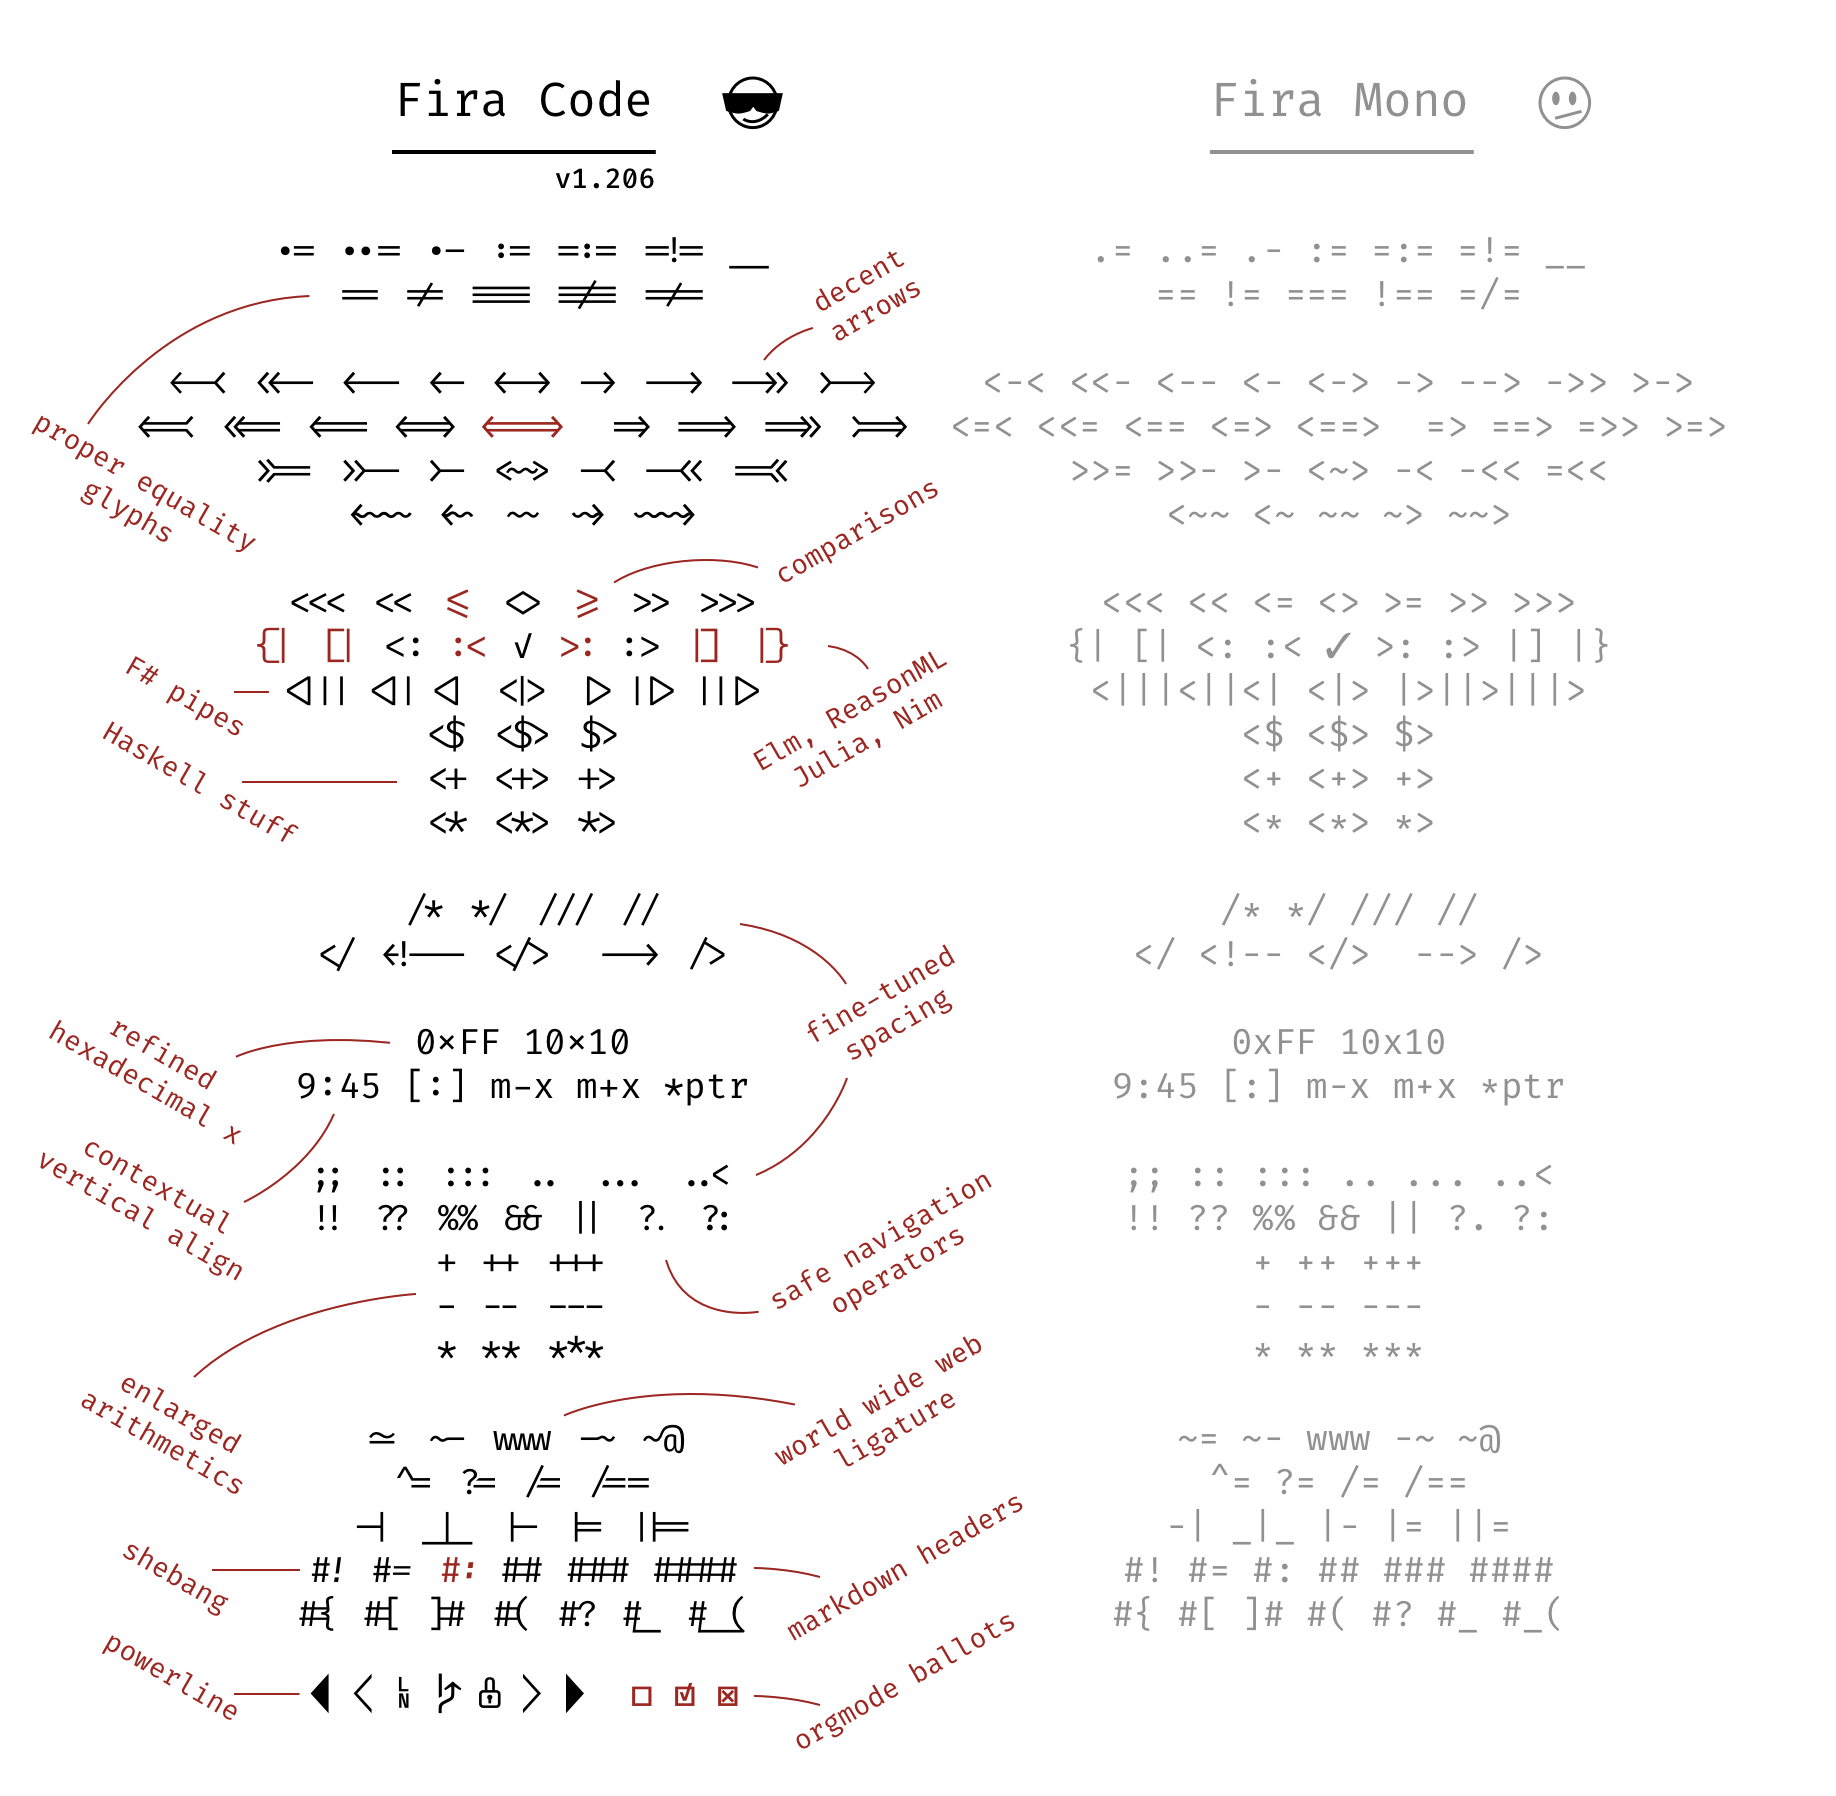
fontSize- personally, I prefer a little bigger font, let’s use 13. Later on you can change the font size in the terminal by usingCMD++andCMD+-keyboard shortcuts.fontFamily- let’s use a really nice font with ligatures - FiraCode . I attach an overview below:
Installing instructions are described here. I prefer the manual way (for Mac OS):
- Download the latest version of the font from Github
releasestab: Releases · tonsky/FiraCode · GitHub - As for now, it’s Fira_Code_v5.2.zip . - Extract the archive and go to
ttfdirectory. - Select all fonts
.ttffiles , click right , thenOpenand selectInstall Font
Now, when our font is installed let’s set it in our Hyper terminal. The config file should be placed in the home directory:
nano ~/.hyper.jsmodule.exports = {
config: {
fontSize: 13,
fontFamily: '"Fira Code", Menlo, "DejaVu Sans Mono", Consolas, "Lucida Console", monospace',
// rest of the config
}
// rest of the file
}
At this point we enabled Fira Code font in the terminal but ligatures are still not enabled. Let’s turn them on.
We need to install a dedicated plugin: hyper-font-ligatures:
hyper i hyper-font-ligatures
Plugin should immediately appear in our config file:
module.exports = {
  // rest of the file
  plugins: ["hyper-font-ligatures"],
To enable ligatures we need to add one more line to the config (See issue #8 and zeit/hyper#3607 for more details):
module.exports = {
  config: {
    // rest of the config
    webGLRenderer: false,
  }
  // rest of the file
}
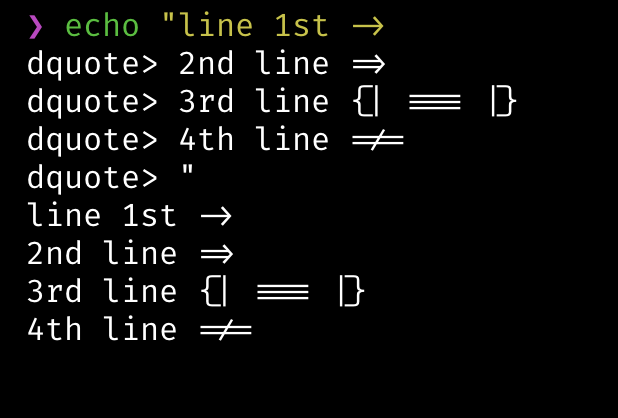
Now, everything should work as expected and we should see new font with ligatures in the terminal:
1.2.2 Theme
With Hyper we can download multiple themes that are available here: Hyper Store - Plugins. I’m going to use Hyper Store - hyper-one-dark theme. To install it, just run:
hyper i hyper-one-dark
With my current shell it looks like this:
1.2.3 Search Plugin
To be able to search for a keyword in the terminal we need to install a dedicated plugin: Hyper Store - hyper-search
hyper i hyper-search
This time we need to restart the Hyper completely. After the restart we can start using our plugin:

1.2.4 Pane Navigation Plugin
If we want to jump between panes in the terminal we need to add Hyper Store - hyper-pane plugin:
hyper i hyper-pane
How it works?

1.2.5 Open new tabs with the same directory
When opening new tabs, I often want to be in the same directory. To be able to do it, let’s add Hyper Store - hypercwd:
hyper i hypercwd
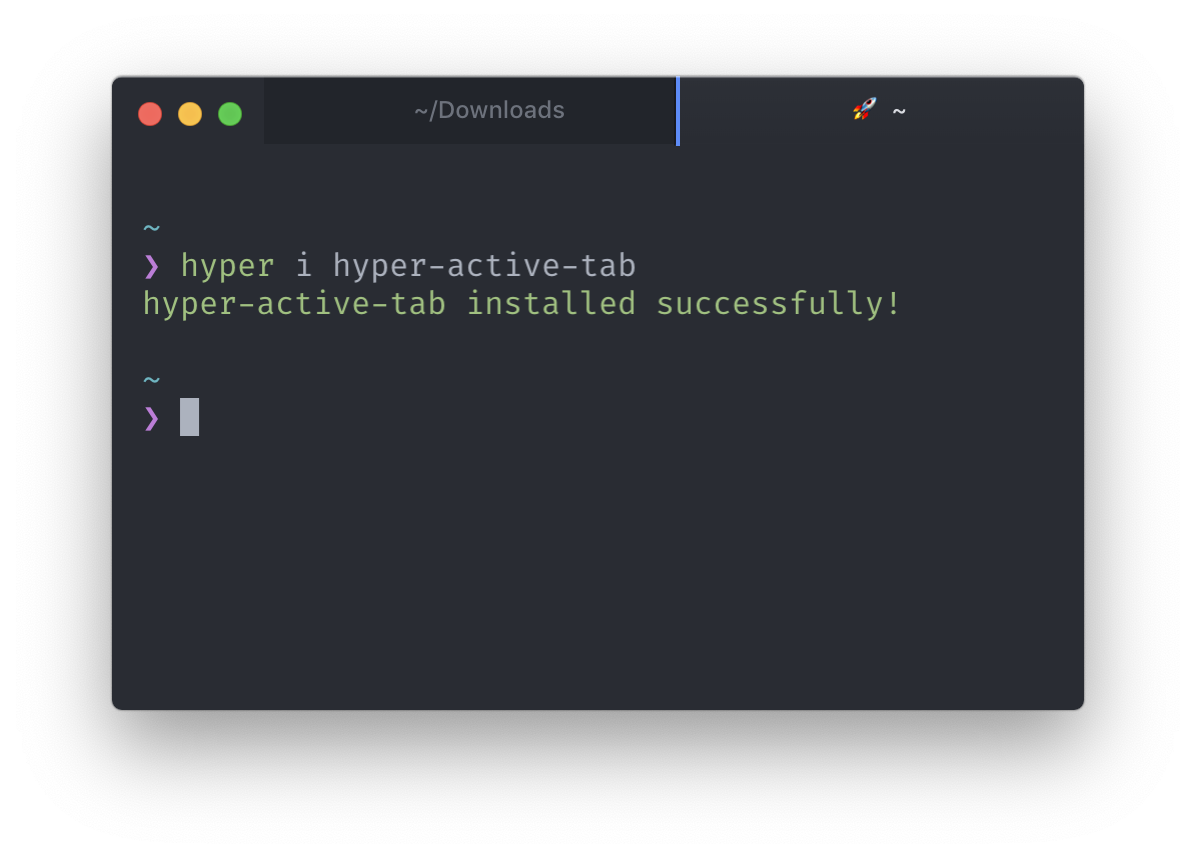
1.2.6 Mark active tab by adding a symbol to it
Sometimes when we have multiple tabs opened it might be difficult to notice which one is active at the moment. Make our life easier and add Hyper Store - hyper-active-tab:
hyper i hyper-active-tab
I’m going to use a custom symbol:
module.exports = {
  config: {
    // rest of the config
    activeTab: '🚀'
  }
  // rest of the file
}
Now, it looks like this:
1.2.7 Showing CPU, RAM, battery stats
If we want to track our CPU, Memory, Battery resources we can add: GitHub - Hyperline/hyperline: ✨ Status line plugin for Hyper ✨:
hyper i hyperline
After full reload new status line will appear:
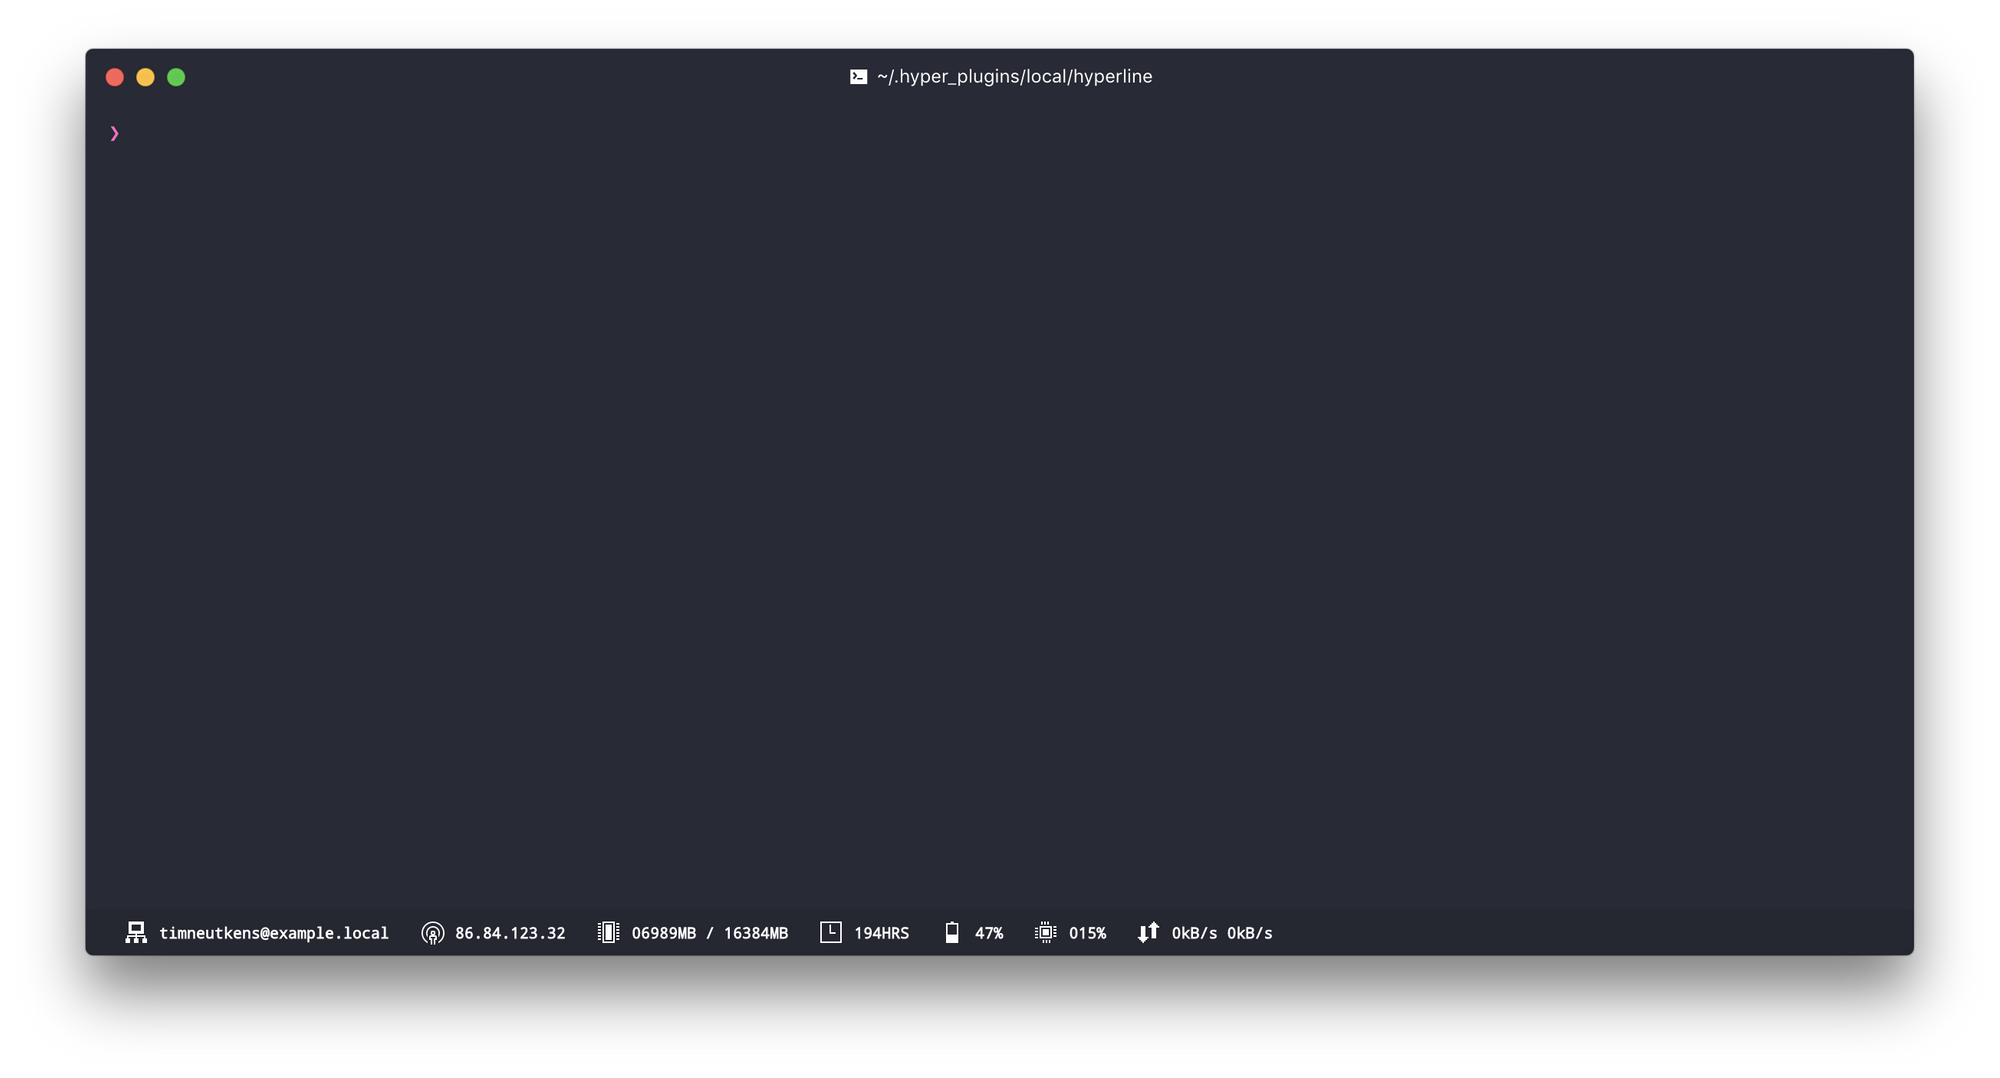
There is even a Spotify plugin showing the currently played song.
1.2.8 Bonus: feel this power!
Javascript enables users to create almost anything. Let’s see what Hyper Store - hyperpower can do:
hyper i hyperpower
This one is quite showy:

There are a lot of other plugins and the list is rapidly growing. For more plugins check especially those two sources:
- Official plugins store: Hyper Store - Plugins
- A repository with the list of Hyper plugins: https://github.com/bnb/awesome-hyper
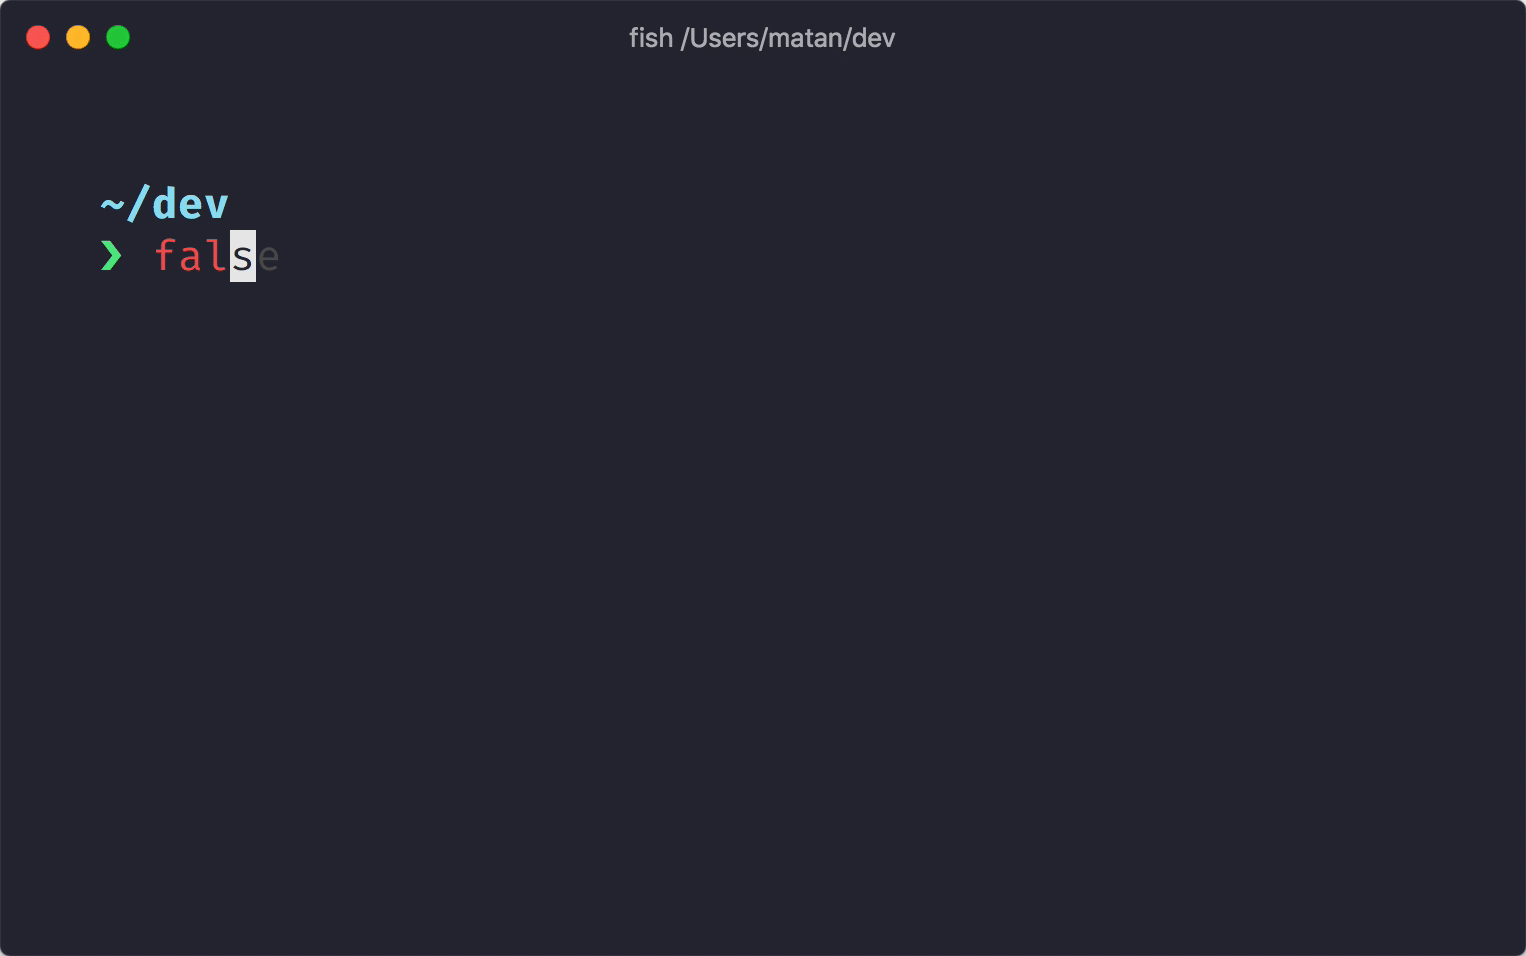
2. Shell - ZSH + starship prompt
There are a few most popular shells for linux:
- Bash Shell - Bash (Unix shell) - Wikipedia
- Tcsh/Csh Shell - https://pl.wikipedia.org/wiki/Tcsh
- Ksh Shell - https://pl.wikipedia.org/wiki/Korn_shell
- Zsh Shell - https://pl.wikipedia.org/wiki/Zsh
- Fish - https://pl.wikipedia.org/wiki/Friendly_interactive_shell
After experimenting with some shells I decided to use ZSH.
2.1 Installing ZSH
For Mac OS:
brew install zsh
If you don’t have a homebrew installed you can add it (official installation docs here):
/usr/bin/ruby -e "$(curl -fsSL https://raw.githubusercontent.com/Homebrew/install/master/install)"
Homebrew is a package manager for macOS.
After installing ZSH check its version:
❯ zsh --version
zsh 5.7.1 (x86_64-apple-darwin19.0)

❯ which zsh
/usr/local/bin/zsh
To use ZSH with Hyper we need to specify it in the config (~/.hyper.js):
module.exports = {
  config: {
    // rest of the config
    shell: '/usr/local/bin/zsh',
  }
  // rest of the file
}
At this point Hyper should start with freshly installed ZSH as default shell.
We can move on to the next point.
2.2 Installing starship prompt
There are many different prompts that can be used. After testing some of them I decided to stay with GitHub - starship/starship: ☄️🌌️ The minimal, blazing-fast, and infinitely customizable prompt for any shell!
2.2.1 Install
There are a few different ways to install starship described in the documentation: GitHub - starship/starship: ☄️🌌️ The cross-shell prompt for astronauts.
For Mac OS:
brew install starship
Check whether it’s working:
❯ starship --version
starship 0.44.0
To enable starship prompt we need to add it to ~/.zshrc. Add following code to the end of ~/.zshrc file:
echo 'eval "$(starship init zsh)"' >> ~/.zshrc
After restarting the Hyper our terminal should look like this:
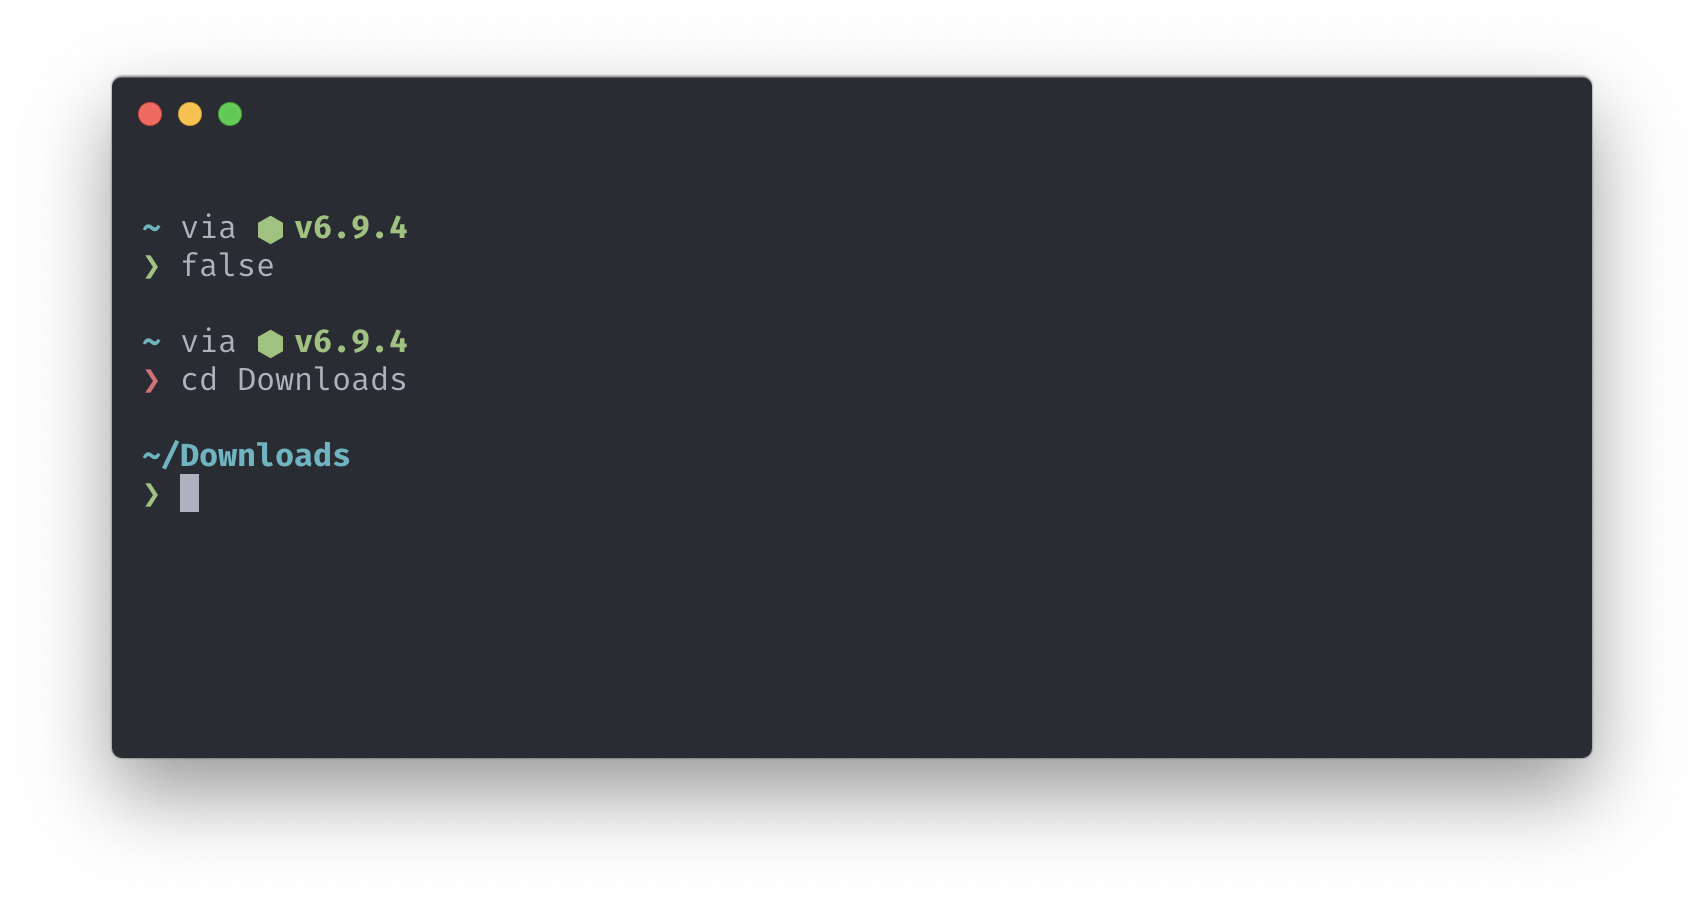
Unfortunately, we don’t have any syntax highlighting, commands completion, history enabled, aliases and a few other things. We need to adjust it.
2.2.2 Syntax Highlighting
There is another great repo with ZSH plugins that you should check out: GitHub - unixorn/awesome-zsh-plugins: A collection of ZSH frameworks, plugins & themes inspired by the various awesome list collections out there.. I searched it for a syntax highlighting plugin.
I’m going to use GitHub - zdharma/fast-syntax-highlighting: (Short name F-Sy-H). Syntax-highlighting for Zshell – fine granularity, number of features, 40 work hours themes.
I will install it by cloning the repo (it will allow later to easily keep it up-to-date by pulling the master):
# Create a `.zsh` directory to store our plugins in one place
mkdir ~/.zsh

# Clone repo to `~/.zsh/` directory
cd ~/.zsh && git clone [email protected]:zdharma/fast-syntax-highlighting.git

# Enable 'fast-syntax-highlighting' plugin in ZSH
echo "source $HOME/.zsh/fast-syntax-highlighting/fast-syntax-highlighting.plugin.zsh" >> ~/.zshrc

# Reload ZSH
source ~/.zshrc
If you couldn't clone the repo and got error like:
[email protected]: Permission denied (publickey)Then try using "Clone with HTTPS", it would look like this:
git clone https://github.com/zdharma/fast-syntax-highlighting.gitAfter those few steps we should have already syntax highlighting enabled:
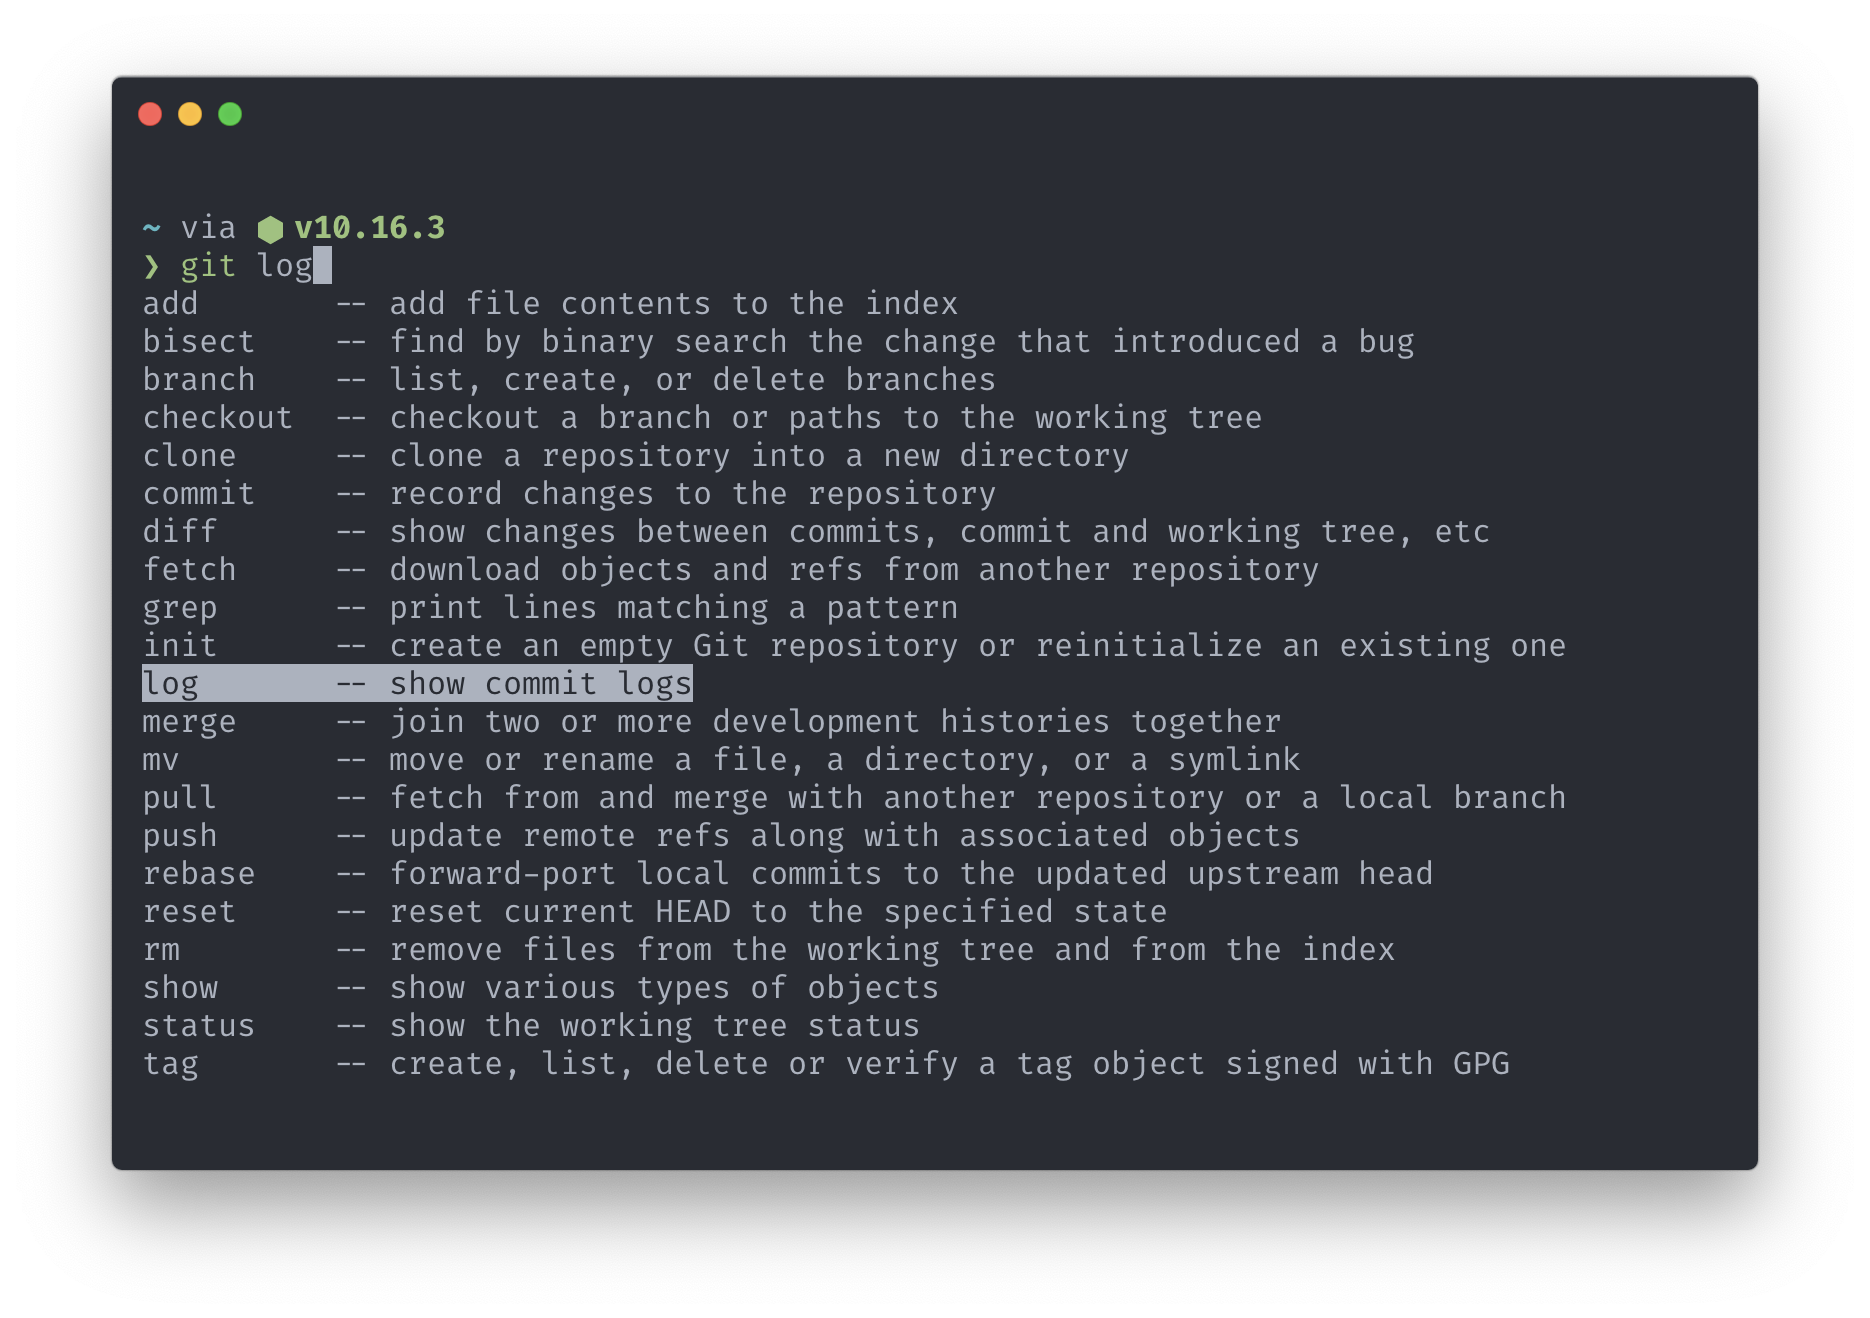
2.2.3 Setting completion plugin
We are going to use already defined completion.zsh from GitHub - robbyrussell/oh-my-zsh:
# Download completion config
cd ~/.zsh && wget https://raw.githubusercontent.com/robbyrussell/oh-my-zsh/master/lib/completion.zsh

# Enable 'completion' plugin in ZSH
echo "source $HOME/.zsh/completion.zsh" >> ~/.zshrc
Additionally, this time we need to add a few more lines to ~/.zshrc file:
# rest of the `~/.zshrc` file

# Load completion config
source $HOME/.zsh/completion.zsh

# Initialize the completion system
autoload -Uz compinit

# Cache completion if nothing changed - faster startup time
typeset -i updated_at=$(date +'%j' -r ~/.zcompdump 2>/dev/null || stat -f '%Sm' -t '%j' ~/.zcompdump 2>/dev/null)
if [ $(date +'%j') != $updated_at ]; then
  compinit -i
else
  compinit -C -i
fi

# Enhanced form of menu completion called `menu selection'
zmodload -i zsh/complist
Restart the terminal and completion should work now:
You might ask, why I don’t use Oh My Zsh? It feels overloaded for me. I like to have control over the tools I use. I prefer to build things starting from small parts and build on that something bigger, step by step.
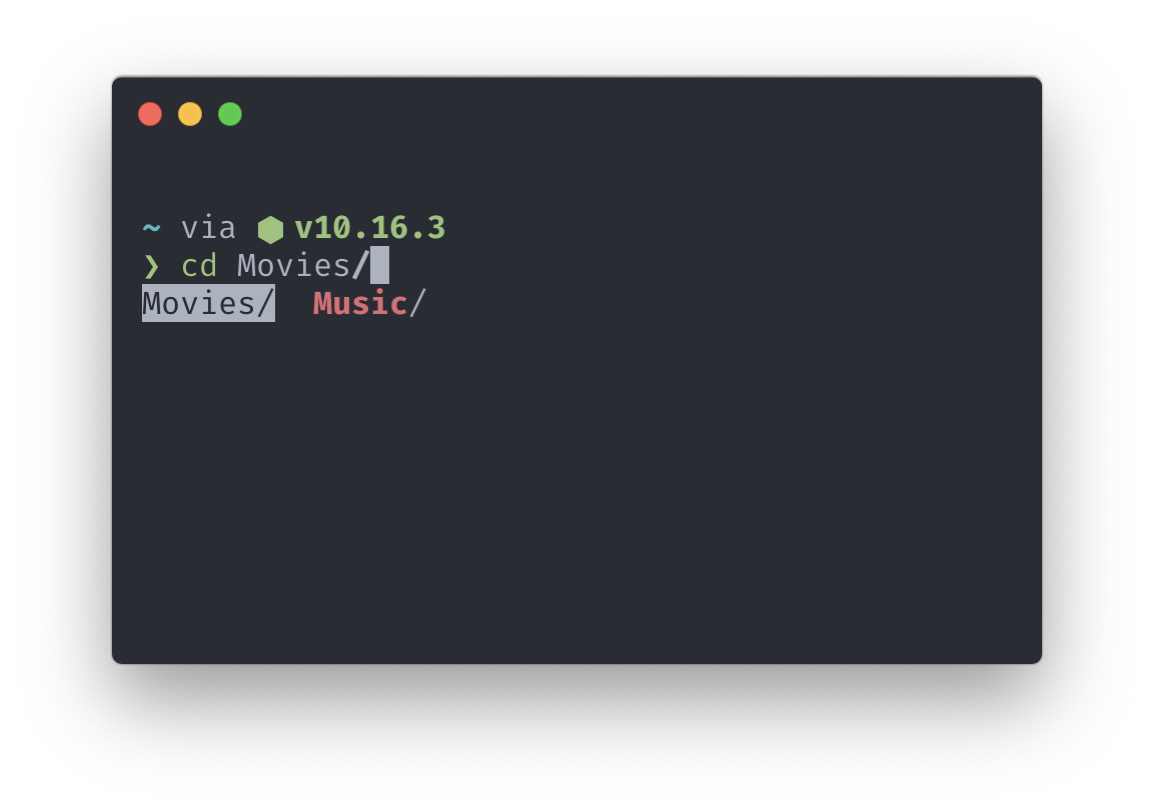
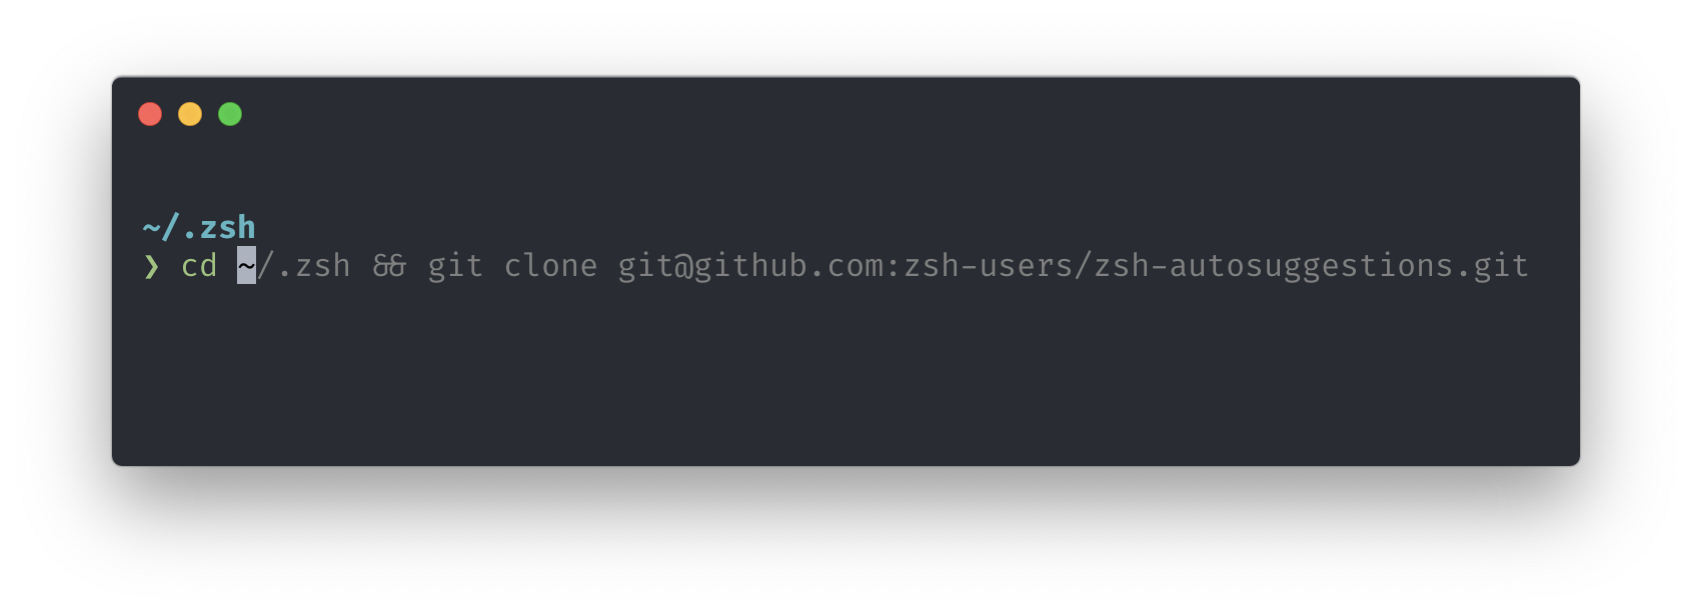
2.2.4 Setting autosuggestions plugin
Except completion feature it’s nice to have also suggestions. When you start typing there is a suggestion displayed in the command line. Let’s use GitHub - zsh-users/zsh-autosuggestions: Fish-like autosuggestions for zsh plugin.
Install it:
# Download 'zsh-autosuggestions' plugin
cd ~/.zsh && git clone [email protected]:zsh-users/zsh-autosuggestions.git

# Enable 'zsh-autosuggestions' plugin in ZSH
echo "source $HOME/.zsh/zsh-autosuggestions/zsh-autosuggestions.zsh" >> ~/.zshrc

# Reload ZSH
source ~/.zshrc
It works really nicely by suggesting the rest of the command, you can use arrows to accept suggested command:
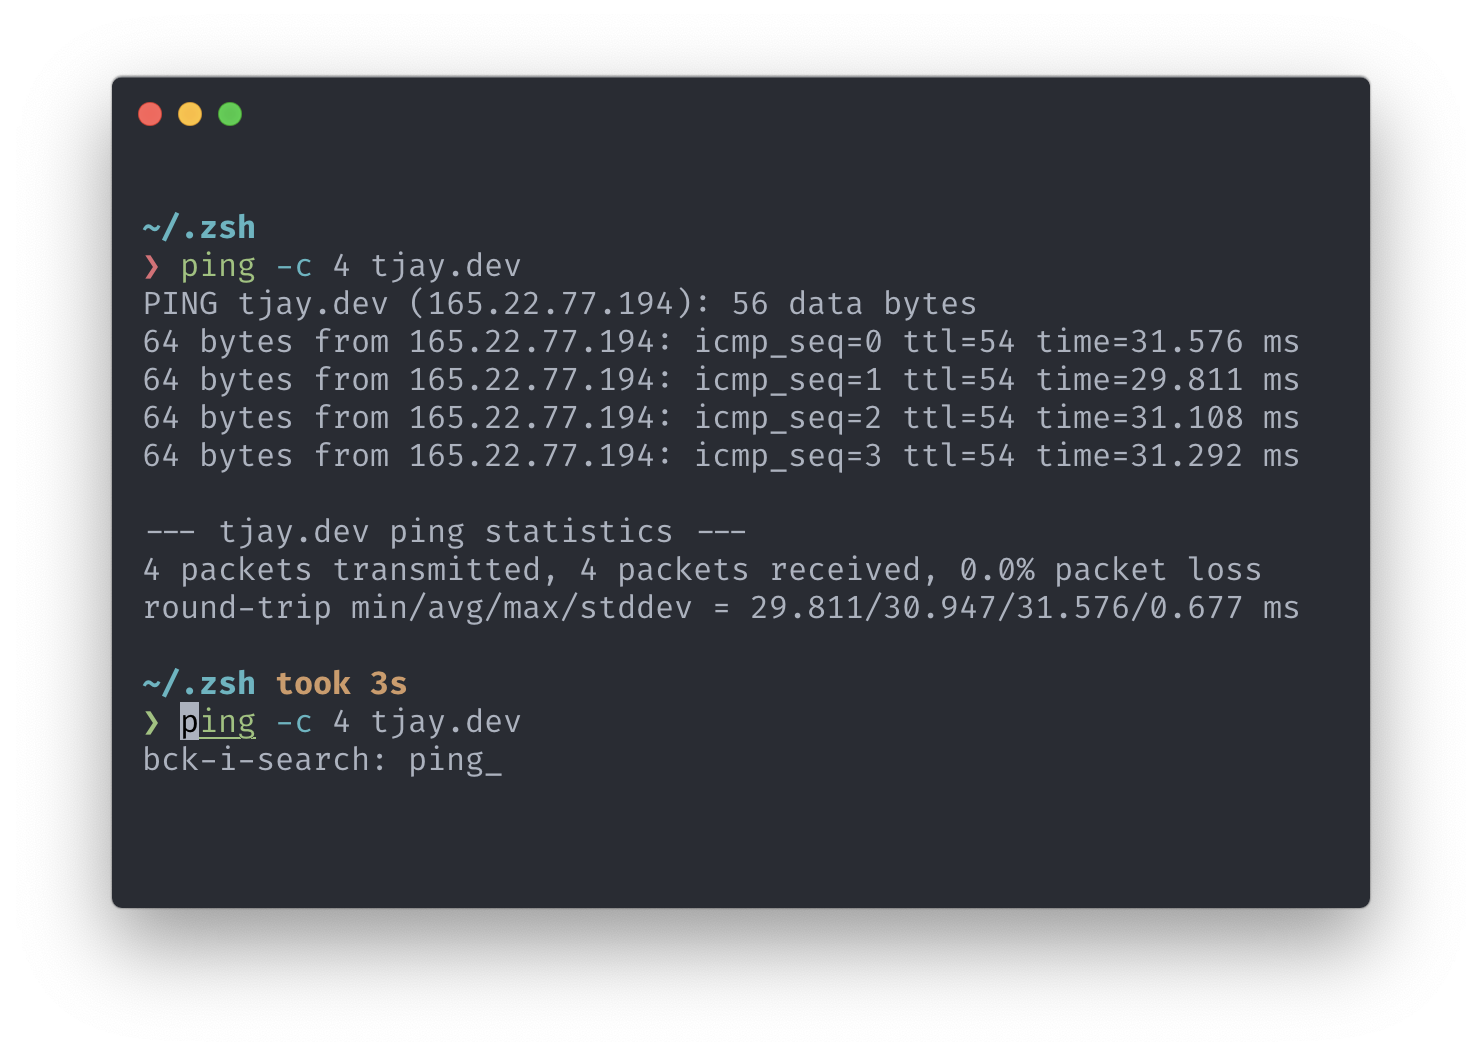
2.2.5 Commands history config
Here again, we are going to use a ready config from oh-my-zsh:
# Download history config
cd ~/.zsh && wget https://raw.githubusercontent.com/robbyrussell/oh-my-zsh/master/lib/history.zsh

# Enable 'history' config in ZSH
echo "source $HOME/.zsh/history.zsh" >> ~/.zshrc

# Reload ZSH
source ~/.zshrc
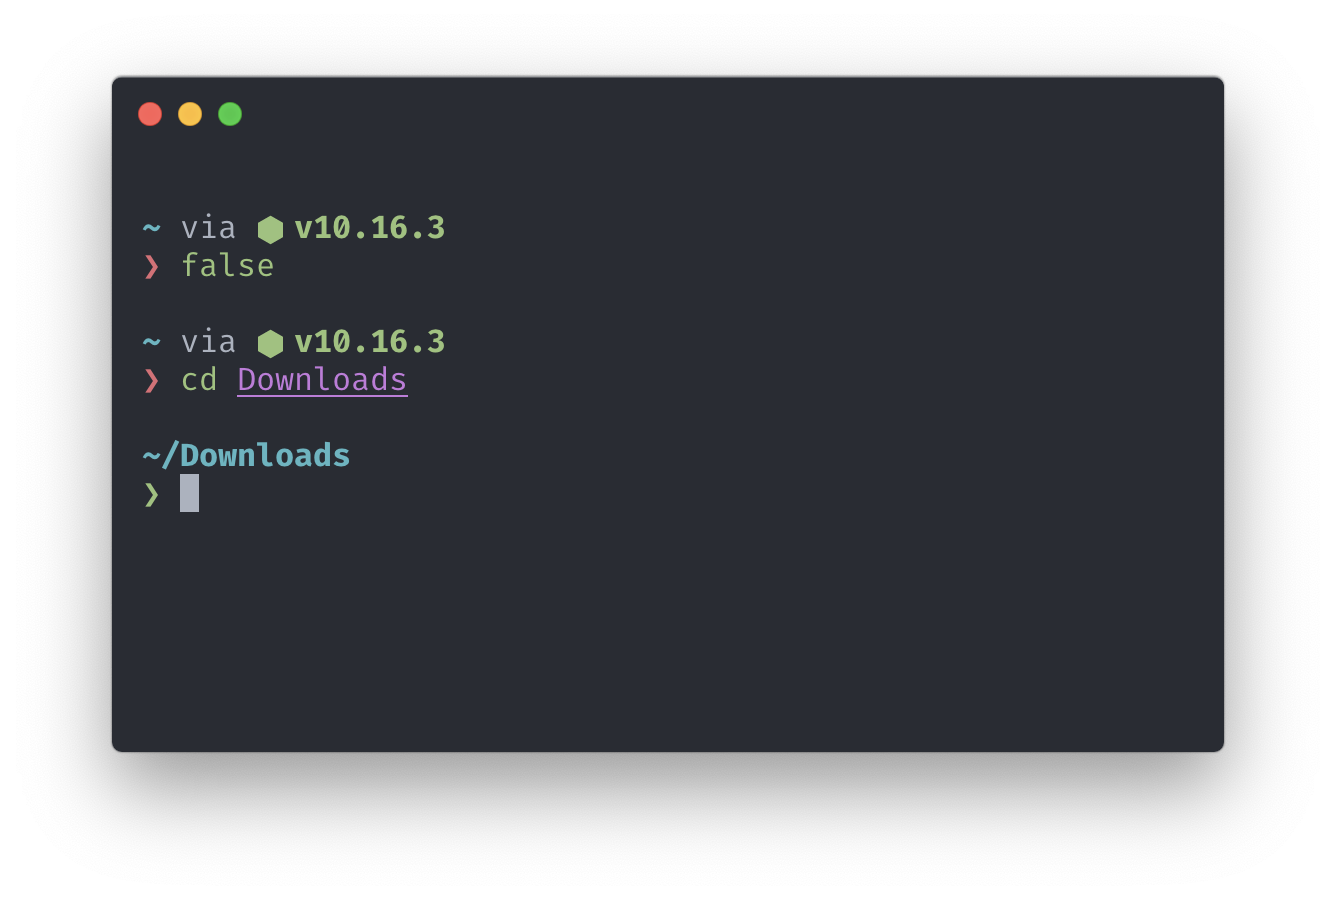
Now, by using the Up Arrow we can go back to our previous commands. We can also use backwards search by clicking CTRL + R:
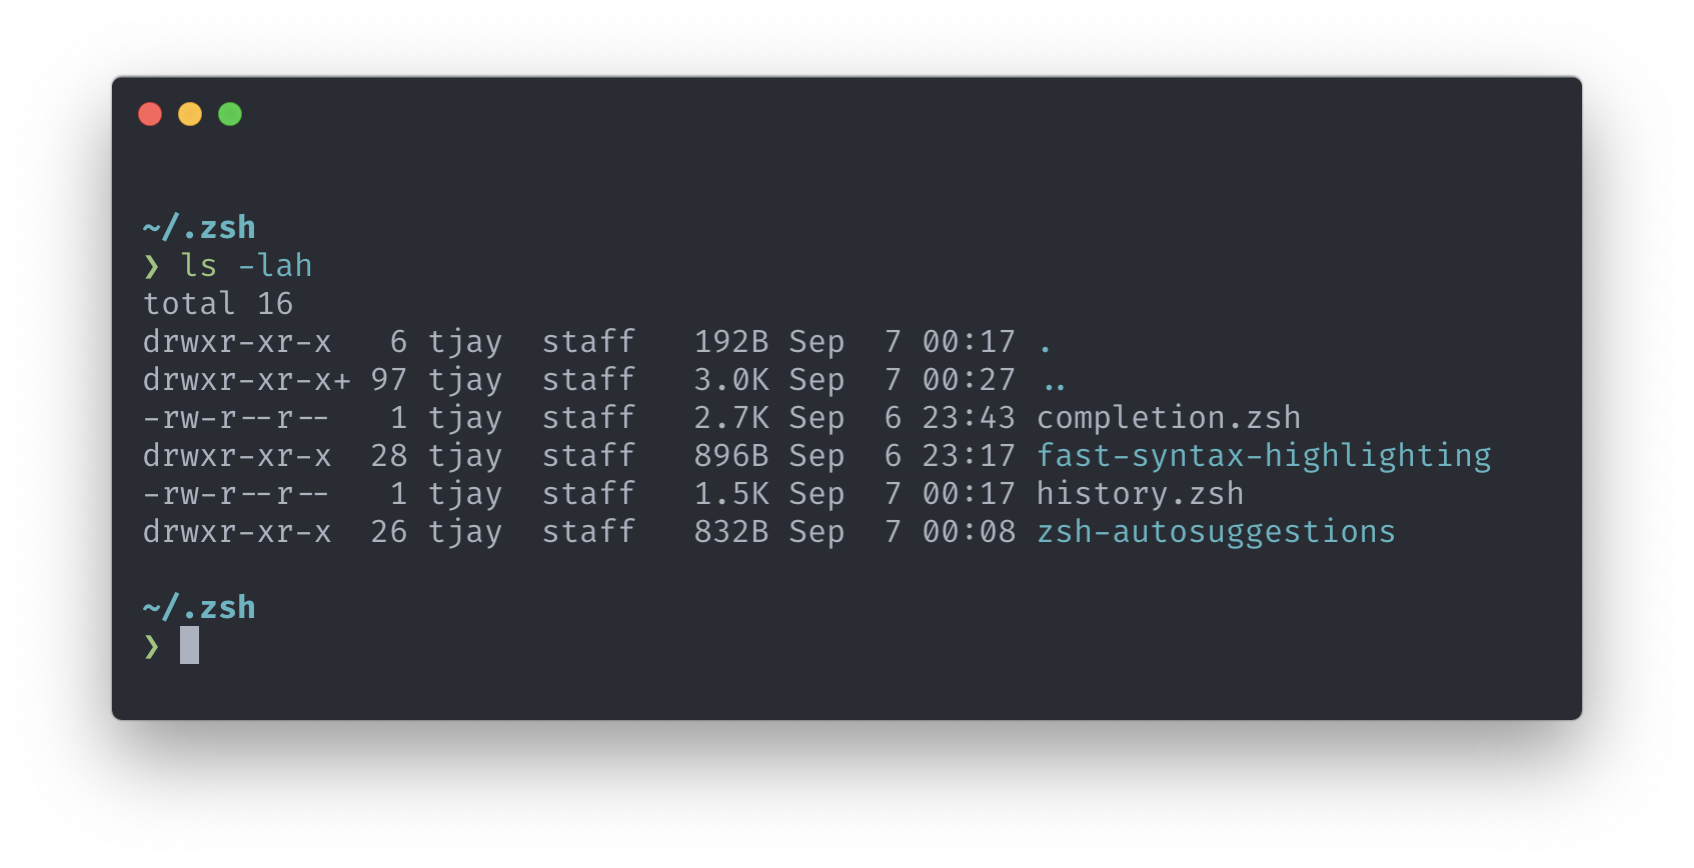
2.2.6 Colorized ls output
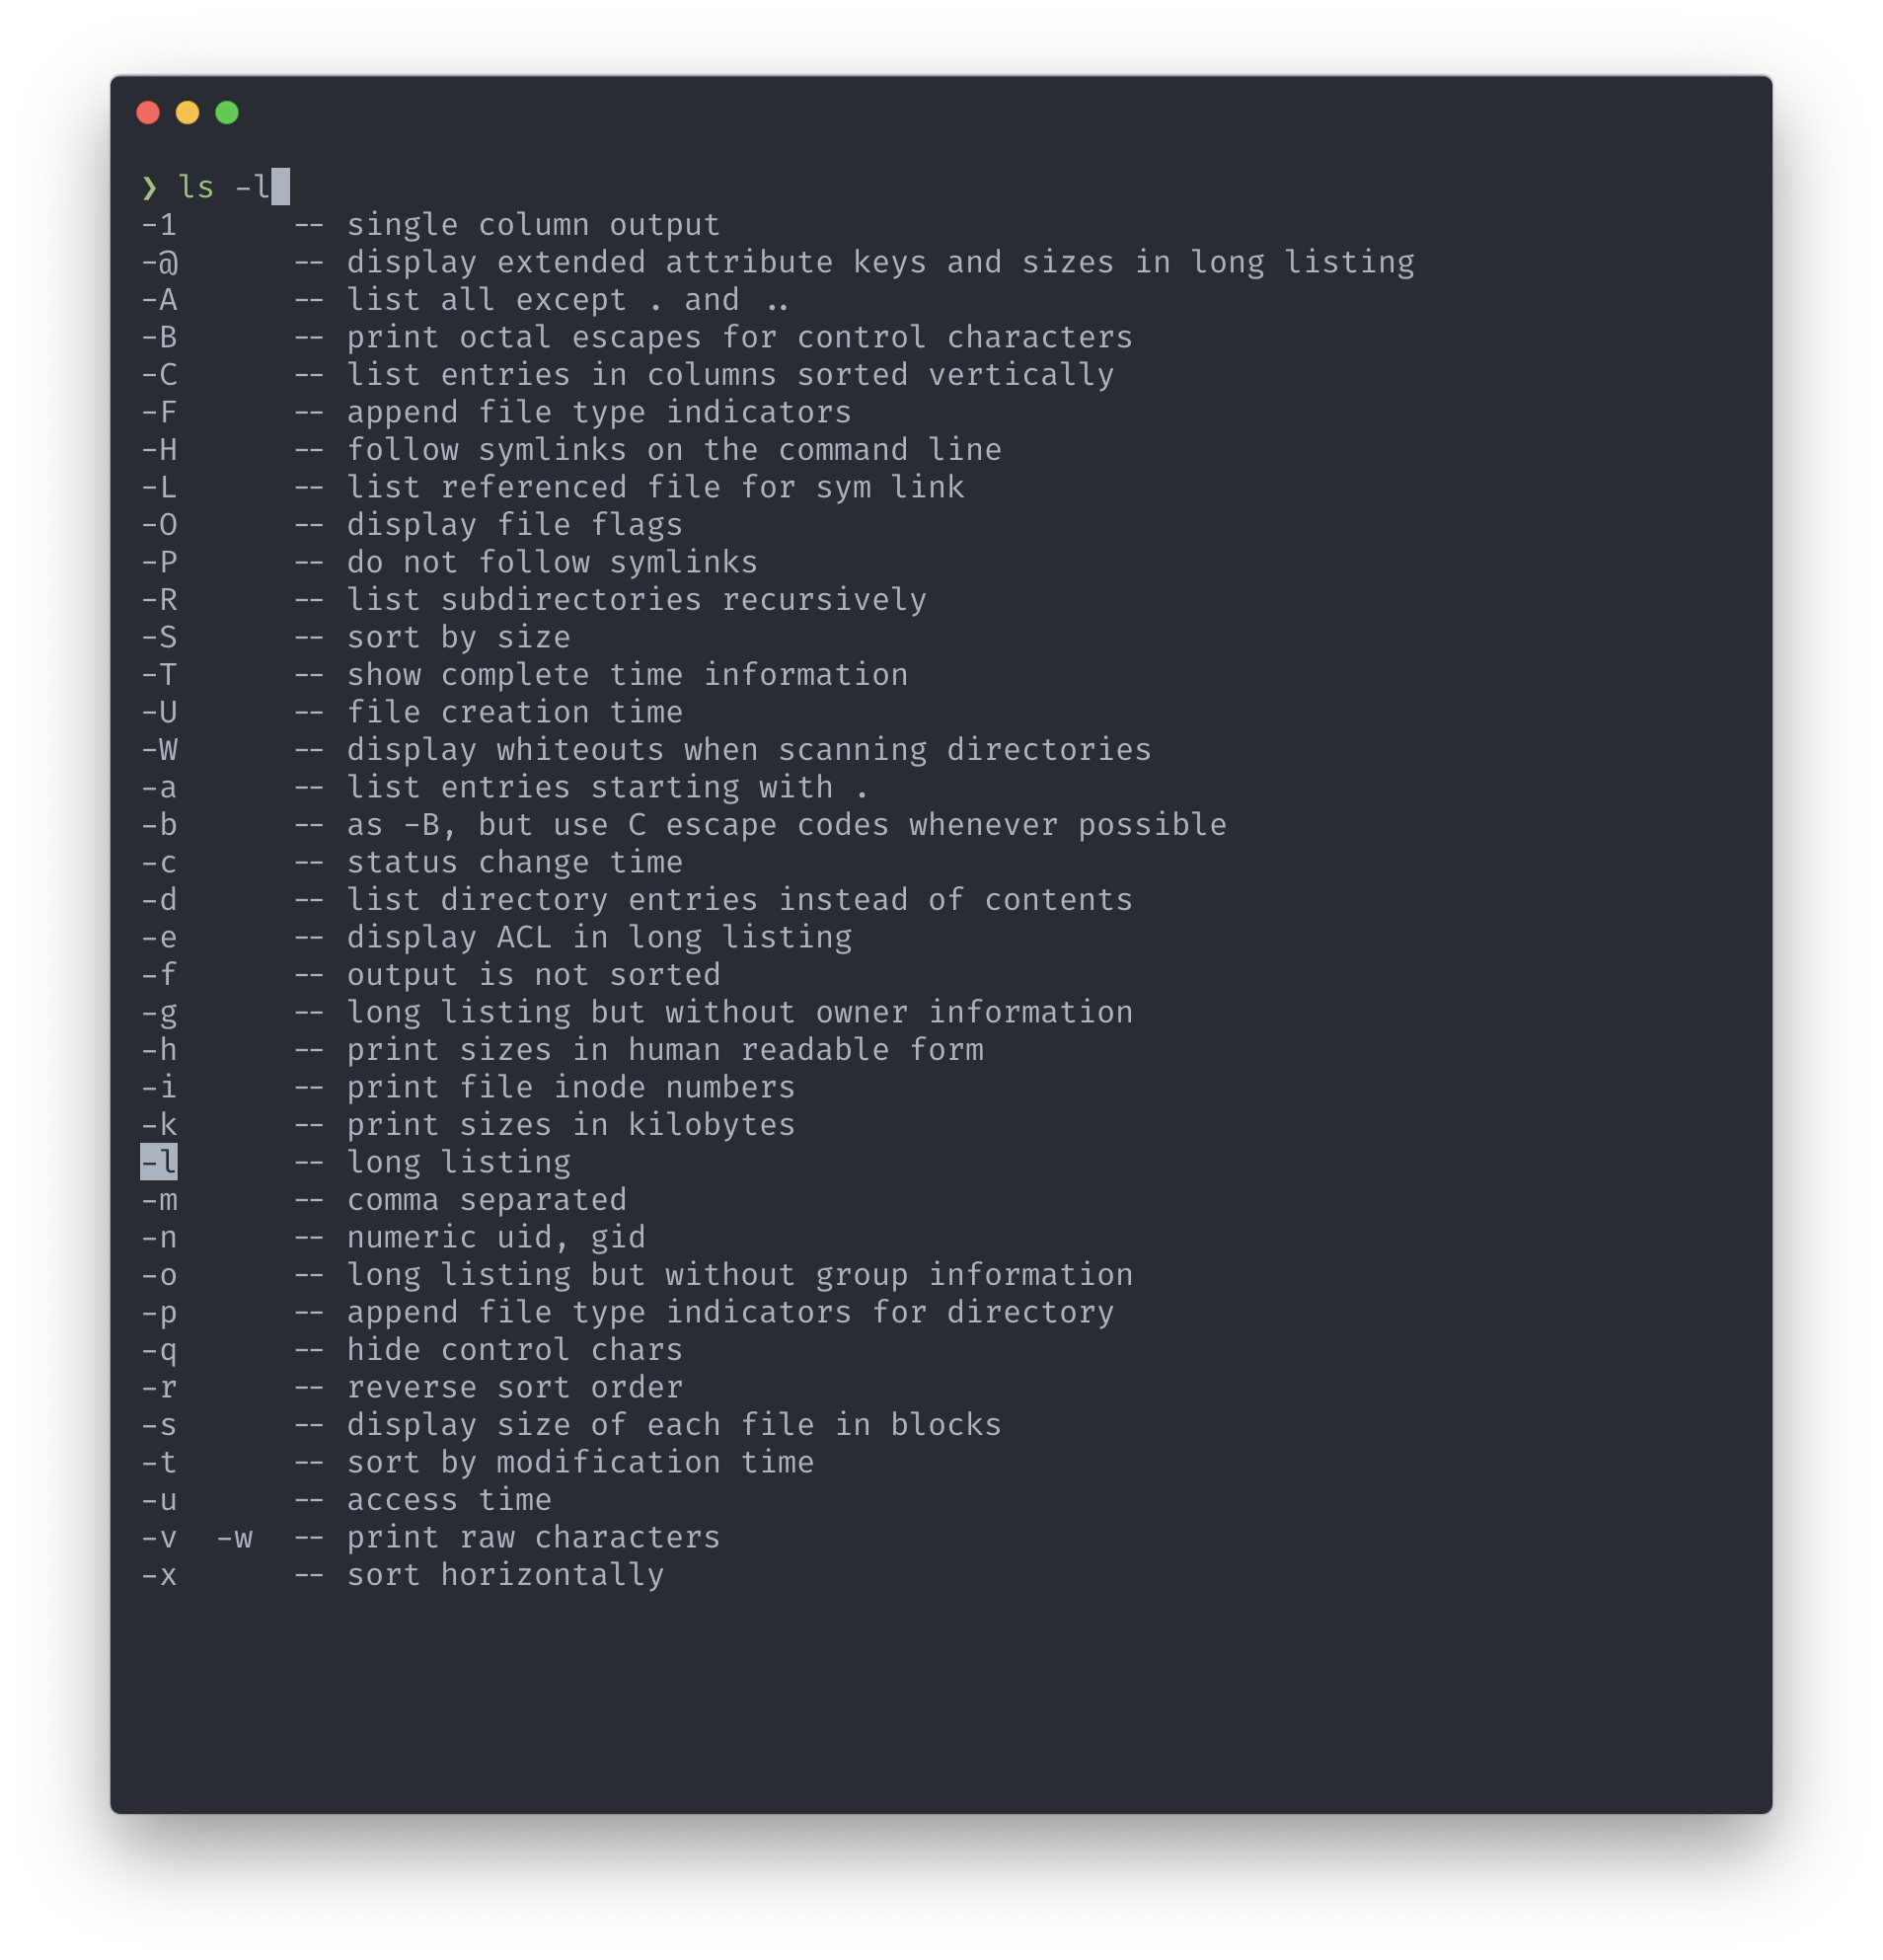
Right now when we want to list a directory’s content we have a raw gray list:
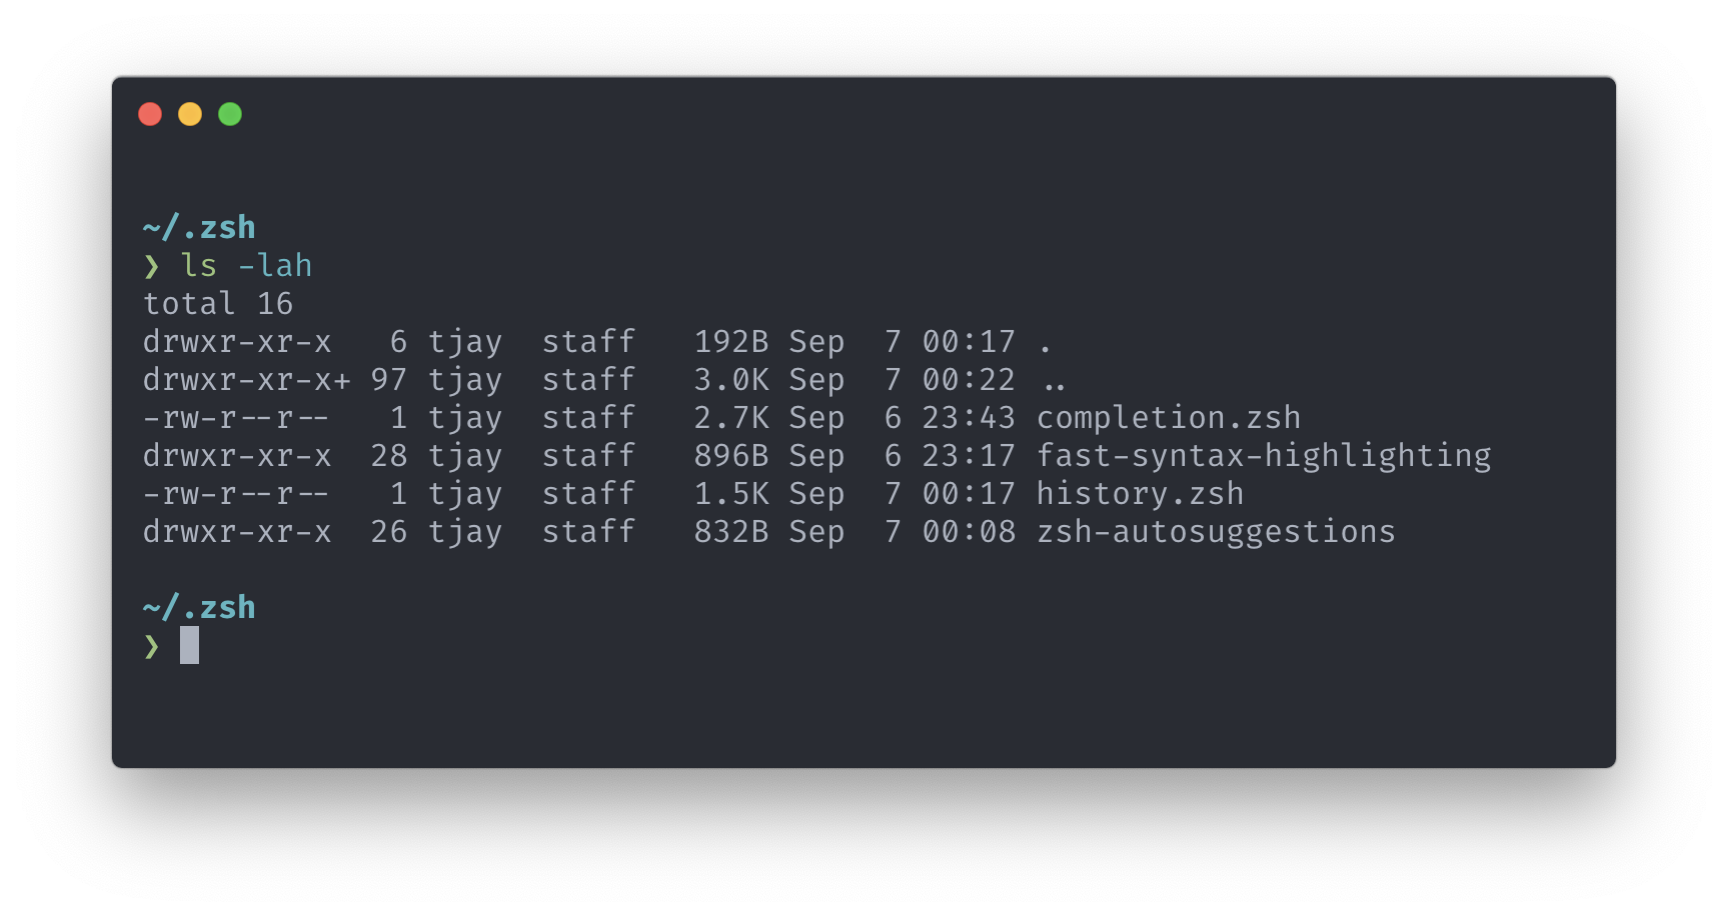
It doesn’t look good. Let’s use some colours to make it more readable.
When you go to ls command’s manual there is a -G option:
-G Enable colorized output. This option is equivalent to defining CLICOLOR in the environment. (See below.)
But, we are not going to add -G each time when we want to use lscommand. We can create an alias for it:
# Enable colorized output for `ls` command.
echo "alias ls='ls -G'" >> ~/.zshrc

# Reload ZSH
source ~/.zshrc
It looks better now:
2.2.7 Key bindings
When working in the terminal on daily basis it’s good to have shortcuts enabled. Going back to the beginning of the line (CMD + LEFT ARROW), or to the end (CMD + RIGHT ARROW)?
Let’s install key bindings:
# Download key bindings config
cd ~/.zsh && wget https://raw.githubusercontent.com/robbyrussell/oh-my-zsh/master/lib/key-bindings.zsh

# Enable 'key-bindings' config in ZSH
echo "source $HOME/.zsh/key-bindings.zsh" >> ~/.zshrc

# Reload ZSH
source ~/.zshrc
2.2.8 Aliases
Shell aliases play a huge part in productivity when using a command line. If you have well defined shortcuts it allows you to be really efficient and quick when developing new apps, scripts, etc.
touch aliases.zsh
echo "source $HOME/.zsh/aliases.zsh" >> ~/.zshrc
A few useful aliases that I often use are listed below:~/.zsh/aliases.zsh
alias ls='ls -G'                              # colorize `ls` output
alias zshreload='source ~/.zshrc'             # reload ZSH
alias shtop='sudo htop'                       # run `htop` with root rights
alias grep='grep --color=auto'                # colorize `grep` output
alias ..='cd ..'
alias ...='cd ../..'
alias ....='cd ../../..'
alias less='less -R'
alias g='git'

alias rm='rm -i'                              # confirm removal
alias cp='cp -i'                              # confirm copy
alias mv='mv -i'                              # confirm move
alias cal='gcal --starting-day=1'             # print simple calendar for current month
alias weather='curl v2.wttr.in'               # print weather for current location (https://github.com/chubin/wttr.in)
As a bonus, I thought that sharing git aliases might also benefit you. The list below might seem to be quite broad but I added comments explaining what each of them is meant to be doing.~/.gitconfig
[alias]
  a = add																		# Add file contents to the index
  ai = add --interactive										# Add modified contents in the working tree interactively to the index.
  ##############
  b = branch
  ba = branch --all                     		# List both remote-tracking branches and local branches.
  bav = branch --all --verbose 							# When in list mode, show sha1 and commit subject line for each head, along with relationship to upstream branch (if any)
  bd = branch --delete 											# Delete a branch. The branch must be fully merged in its upstream branch, or in HEAD if no upstream was set with --track or --set-upstream-to.
  bdd = branch -D 													# Shortcut for --delete --force.
  bm = branch --move												# Move/rename a branch and the corresponding reflog.
  bmm = branch -M 													# Shortcut for --move --force.
  br = branch --remotes 										# List or delete (if used with -d) the remote-tracking branches.
  ##############
  c = commit 																# Record changes to the repository
  ca = commit --all													# Tell the command to automatically stage files that have been modified and deleted, but new files you have not told Git about are not affected.
  cm = commit -m 														# Use the given <msg> as the commit message.
  cam = commit -am 													# Shortcut for --all and -m
  cem = commit --allow-empty -m							# Allows to create a commit without any files modified
  cd = commit --amend												# Replace the tip of the current branch by creating a new commit.
  cad = commit --all --amend								# Shortcut for --amend and --all
  cadne = commit --all --amend --no-edit		# Amends a commit without changing its commit message.
  ##############
  cl = clone 																# Clone a repository into a new directory
  cld = clone --depth 1											# Create a shallow clone with a history truncated to the specified number of commits.
  ##############
  cp = cherry-pick													# Apply the changes introduced by some existing commits
  cpa = cherry-pick --abort									# Cancel the operation and return to the pre-sequence state.
  cpc = cherry-pick --continue 							# Continue the operation in progress using the information in .git/sequencer. Can be used to continue after resolving conflicts in a failed cherry-pick or revert.
  cps = cherry-pick --skip 									# Skip the current commit and continue with the rest of the sequence.
  ##############
  d = diff																	# Show changes between commits, commit and working tree, etc
  di = !"d() { git diff --patch-with-stat HEAD~$1; }; git diff-index --quiet HEAD -- || clear; d" 	# `git di $number` shows the diff between the state `$number` revisions ago and the current state
  dt = difftool															# Show changes using common diff tools
  ##############
  f = fetch 																# Download objects and refs from another repository
  fo = fetch origin 												# Update the remote-tracking branches
  fu = fetch upstream												# Fetch the branches and their respective commits from the upstream repository.
  ##############
  fk = fsck 																# Verifies the connectivity and validity of the objects in the database
  ##############
  g = grep -p																# Print lines matching a pattern
  ##############
  l = log --oneline													# Show commit logs, the commit message is prefixed with this information on the same line.
  lg = log --oneline --graph --decorate			# Draw a text-based graphical representation of the commit history on the left hand side of the output.
  lgs = !"git log --pretty=format:"%C(yellow)%h\\ %ad%Cred%d\\ %Creset%s%Cblue\\ [%cn]" --decorate --date=short" 													# SHA + date + Commit message + author
  lgc = !"git log --pretty=format:"%C(yellow)%h%Cred%d\\ %Creset%s%Cblue\\ [%cn]" --decorate --numstat"																		# SHA + Commit message + author + changed files
  lgt = !"git log --graph --pretty='%Cred%h%Creset -%C(yellow)%d%Creset %s %Cgreen(%cr) %C(bold blue)<%an>%Creset' --abbrev-commit --all" # As tree: SHA + Commit message + Time ago + author
  ##############
  ls = ls-files															# Show information about files in the index and the working tree
  lsm = ls-files --modified									# Show modified files in the output
  lss = ls-files --stage										# Show staged contents' mode bits, object name and stage number in the output.
  ##############
  m = merge 																# Join two or more development histories together
  ma = merge --abort												# Abort the current conflict resolution process, and try to reconstruct the pre-merge state.
  mc = merge --continue											# After a git merge stops due to conflicts you can conclude the merge by running git merge --continue
  mq = merge --quit													# Forget about the current merge in progress. Leave the index and the working tree as-is.
  mm = merge master 												# Merge 'master' branch to the current branch.
  ##############
  o = checkout 															# Switch branches or restore working tree files.
  om = checkout master											# Switch branch to master.
  ob = checkout -b 													# Create and switch to a new branch
  ##############
  pr = prune --verbose --progress						# Prune all unreachable objects from the object database. Report all removed objects. Show progress.
  prn = prune --dry-run											# Do not remove anything; just report what it would remove.
  ##############
  ps = push 																# Update remote refs along with associated objects
  psa = push --all 													# Push all branches (i.e. refs under refs/heads/); cannot be used with other <refspec>.
  psf = push --force												# Usually, the command refuses to update a remote ref that is not an ancestor of the local ref used to overwrite it. This flag disables these checks, and can cause the remote repository to lose commits; use it with care.
  psu = push --set-upstream									# For every branch that is up to date or successfully pushed, add upstream (tracking) reference.
  ##############
  pso = push origin													# `origin` is an alias in the system for a particular remote repository. Can be checked by running `git remote -v`.
  psao = push --all origin									# Same as `push --all` but for origin.
  psfo = push --force origin								# Same as `push --force` but for origin.
  psuo = push --set-upstream origin					# Same as `push --set-upstream` but for origin.
  #############
  psom = push origin master 								# Same as `push origin` but for master branch.
  psaom = push --all origin master					# Same as `push --all origin` but for master branch.
  psfom = push --force origin master				# Same as `push --force origin` but for master branch.
  psuom = push --set-upstream origin master # Same as `push --set-upstream origin` but for master branch.
  #############
  pl = pull 																# Fetch from and integrate with another repository or a local branch.
  plr = pull --rebase 											# When true, rebase the current branch on top of the upstream branch after fetching.
  plv = pull --verbose 											# Pass --verbose to git-fetch and git-merge.
  #############
  plo = pull origin 											  # Same as `pull` but for origin.
  plro = pull --rebase origin								# Same as `pull --rebase` but for origin.
  plom = pull origin master									# Same as `pull origin` but for master branch.
  #############
  plu = pull upstream												# Same as `pull` but for upstream.
  plum = pull upstream master								# Same as `pull upstream` but for master branch.
  plrum = pull --rebase upstream master    	# Same as `pull --rebase` but for upstream and master branch.
  #############
  rb = rebase																# Reapply commits on top of another base tip.
  rba = rebase --abort											# Abort the rebase operation and reset HEAD to the original branch.
  rbc = rebase --continue 									# Restart the rebasing process after having resolved a merge conflict.
  rbi = rebase --interactive                # Make a list of the commits which are about to be rebased. Let the user edit that list before rebasing. This mode can also be used to split commits.
  rbs = rebase --skip 											# Restart the rebasing process by skipping the current patch.
  rbin = "!r() { git rebase -i HEAD~$1; }; r" # Interactive rebase with the given number of latest commits.
  #############
  re = reset																# Reset current HEAD to the specified state
  rh = reset HEAD 													# HEAD is defined explicitly
  reh = reset --hard												# Resets the index and working tree. Any changes to tracked files in the working tree since <commit> are discarded.
  rem = reset --mixed												# Resets the index but not the working tree (i.e., the changed files are preserved but not marked for commit) and reports what has not been updated. This is the default action.
  res = reset --soft                        # Does not touch the index file or the working tree at all (but resets the head to <commit>, just like all modes do). This leaves all your changed files "Changes to be committed".
  rehh = reset --hard HEAD									# HEAD is defined explicitly
  remh = reset --mixed HEAD									# HEAD is defined explicitly
  resh = reset --soft HEAD									# HEAD is defined explicitly
  rehom = reset --hard origin/master				# Throw away all my staged and unstaged changes, forget everything on my current local branch and make it exactly the same as origin/master.
  #############
  r = remote																# Manage set of tracked repositories
  ra = remote add 													# Adds a remote named <name> for the repository at <url>.
  rr = remote remove												# Remove the remote named <name>. All remote-tracking branches and configuration settings for the remote are removed.
  rv = remote --verbose											# Be a little more verbose and show remote url after name.
  rn = remote rename												# Rename the remote named <old> to <new>. All remote-tracking branches and configuration settings for the remote are updated.
  rp = remote prune 												# Deletes stale references associated with <name>. By default, stale remote-tracking branches under <name> are deleted, but depending on global configuration and the configuration of the remote we might even prune local tags that haven't been pushed there.
  rs = remote show 													# Gives some information about the remote <name>.
  rao = remote add origin 									# Add new origin.
  rau = remote add upstream									# Add new upstream.
  rro = remote remove origin								# Remove origin.
  rru = remote remove upstream              # Remove upstream.
  rso = remote show origin									# Show current origin.
  rsu = remote show upstream								# Show current upstream.
  rpo = remote prune origin                 # Prune current origin.
  rpu = remote prune upstream								# Prune current upstream.
  #############
  rmf = rm -f																# Remove files from the working tree and from the index. Override the up-to-date check.
  rmrf = rm -r -f														# Same as above + Allow recursive removal when a leading directory name is given.
  #############
  s = status																# Show the working tree status
  sb = status -s -b													# Same as above + Give the output in the short-format. Show the branch and tracking info even in short-format.
  #############
  sa = stash apply													# Like pop, but do not remove the state from the stash list.
  sc = stash clear													# Remove all the stash entries. Note that those entries will then be subject to pruning, and may be impossible to recover.
  sd = stash drop														# Remove a single stash entry from the list of stash entries. When no <stash> is given, it removes the latest one.
  sl = stash list														# List the stash entries that you currently have.
  sp = stash pop														# Remove a single stashed state from the stash list and apply it on top of the current working tree state, i.e., do the inverse operation of git stash push.
  sps = stash push 													# Save your local modifications to a new stash entry and roll them back to HEAD (in the working tree and in the index). The <message> part is optional and gives the description along with the stashed state.
  spsk = stash push -k											# All changes already added to the index are left intact.
  sw = stash show														# Show the changes recorded in the stash entry as a diff between the stashed contents and the commit back when the stash entry was first created. When no <stash> is given, it shows the latest one.
  st = !git stash list | wc -l 2>/dev/null | grep -oEi '[0-9][0-9]*'
  #############
  t = tag																		# Create, list, delete or verify a tag object signed with GPG.
  td = tag --delete													# Delete existing tags with the given names.
  tl = tag --list														# Show verbose output about tags.
  #############
  w = show                                  # Show various types of objects.
  wo = show --oneline												# This is a shorthand for "--pretty=oneline --abbrev-commit" used together.
  wf = show --format=fuller									# Print more extensive info.
  #############
  aliases = !git config -l | grep alias | cut -c 7- # List git aliases
  branches = branch --all 									# List both remote-tracking branches and local branches.
  remotes = remote --verbose 								# Be a little more verbose and show remote url after name.
  contributors = shortlog --summary --numbered	# List contributors with number of commits
  amend = commit --amend --no-edit					# Amend the currently staged files to the latest commit.
  go = "!f() { git checkout -b \"$1\" 2> /dev/null || git checkout \"$1\"; }; f"	# Switch to a branch, creating it if necessary
  fb = "!f() { git branch -a --contains $1; }; f"																	# Find branches containing commit
  ft = "!f() { git describe --always --contains $1; }; f"													# Find tags containing commit
  fc = "!f() { git log --pretty=format:'%C(yellow)%h  %Cblue%ad  %Creset%s%Cgreen  [%cn] %Cred%d' --decorate --date=short -S$1; }; f"				# Find commits by source code
  fm = "!f() { git log --pretty=format:'%C(yellow)%h  %Cblue%ad  %Creset%s%Cgreen  [%cn] %Cred%d' --decorate --date=short --grep=$1; }; f" 	# Find commits by commit message
  dm = "!git branch --merged | grep -v '\\*' | xargs -n 1 git branch -d"	# Remove branches that have already been merged with master (a.k.a. ‘delete merged’)
Summary
I hope you will find this article useful and it will help you boost your productivity in the command line. It’s not an ultimate setup, rather treat it as a beginning or enhancement for your current setup. The amount of available tools, plugins, configs is simply overwhelming. Each user has different use cases, different technologies that he uses.
I tried to focus on the common ground which could be used by anyone.
If you know and recommend some of the tools you use and can’t live without please let me know in the comments.